Monday, December 6, 2010

Monster Bags

If you haven't been to Ucreate with Kids, you should check it out. I mostly like to look, but sometimes things stick in my head and we actually do them. These fall leaves were really fun and I had everything on hand. I forgot to take a picture, but we made enough to hang in the front entry and even my super artistic brother-in-law asked how we did them.
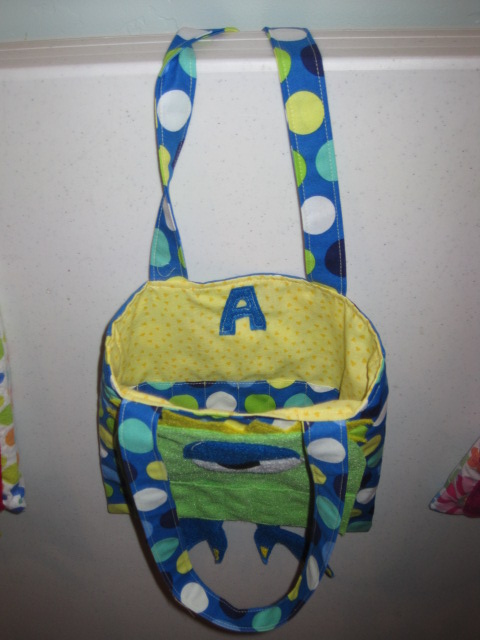
I found this adorable monster bag tutorial and decided to make it on the spot. The red one is Logan's and even though it somehow turned out really small, Logan loves it. He helped me choose the colors and glued the eyes together. The little pockets in the front hold crayons and markers and we put snacks and paper inside. It's perfect to take to church or in the car. His cousins were intrigued with his monster bag so I decided to make them each one for Christmas. I think they turned out pretty cute.

Sunday, October 31, 2010

Halloween Crafts

I wanted to put something in these frames, so I googled around for a while and found frankenstien at this website and adapted him a little. I can't remember where I found the idea for the mummy, but if I did him over again I would tear the paper instead of just cutting it.
*They are both 5x7*
I wanted to do something with the kids silhouettes, and this is what I came up with. I took their profiles, added horn to Logan's and a hat to Lydia's, then printed them out on the opposite side of my vinyl. (If only I had a silhouette:() That way I could cut out the image. I put them on the glass in these shadow box frames with spooky paper behind and I think it turned out cool.
*These are 5x5*

This one doesn't look very exciting, but it filled the space I needed it too. I found a scrap of wood and painted the edges black and orange, then printed out the wording directly onto the orange paper and mod podged it onto the wood.
 

Thursday, September 2, 2010

Birthday Shirts

 I decorated this shirt for Logan's second birthday. I found the red tee at DI but it was longsleeved. I shortened them, then cut out the number and letters from felt. I took this picture the day I tore off the design and turned it into a USA shirt for Independence Day:
For his third birthday I tried my hand at freezer paper stenciling. I cut the letters out of freezer paper using the Cricut and went to work. (All this on his actual birthday) I didn't wash his shirt beforehand, but next time I will. The paint cracked after washing the shirt and I think that's why. On the back it says, "What's your excuse."

Friday, August 27, 2010

Lydia's Dresser

Theron's grandparents rescued five of these dressers from the apartments they used to own. Until recently, this one was sitting in their garage storing odds and ends most people wouldn't consider saving. I have been waiting for the renters to move out so I could go and save it.
The hardest part about refinishing old dressers is the non-standard hole centers on the drawer pulls. I decided (a little late) to fill the holes and drill new ones so I wasn't limited to one style of pull. I also filled the center hole on the top drawers because knobs aren't cheap.
First coat of primer. I ended up priming at least twice and then three coats of paint. I meticulously sanded between every coat. The top could probably use another, but its good enough for me.
Logan wanted to paint, so I gave him the awesome responsibility of painting the back. He loved it!

All finished with the new hardware. I ended up going to eBay for the knobs and pulls and am happy with the result. I think I should have sprung for two more knobs, but Theron thinks it would have been too much. Really he just doesn't like me second guessing myself. :)
What do you think? It's for Lydia's room and I'm going for a shabby-chic look. Should I sand down the edges? Add two more knobs? Or just leave it alone?